F01 carplay android auto&carplay guidance
Fahren F01 Car Play Installation Guide
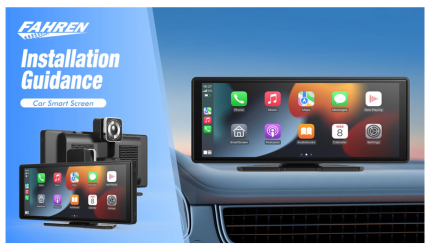
This guide provides step-by-step instructions for installing the Fahren F01 Car Play display unit and rear camera, ensuring you can easily set up your device and enjoy a seamless in-car smart experience.
Part 1: Display Installation Guide
Peel Off the Protective Sticker
Before starting, peel off the protective sticker from the display screen to ensure the surface is clean and free from any protective film.
Choose the Best Installation Position
Select the most suitable position to mount the display unit on your dashboard or center console. Ensure the position is easy to view while driving without interfering with your driving operations.
Release the Suction Cup
Release the suction cup from the display unit and press it firmly onto the chosen location to ensure it sticks securely.
Fix the Suction Cup
Gently press down on the center of the suction cup to ensure that the display is firmly in place and stays securely mounted.
Part 2: Rear Camera Installation Guide
1. Install the Power Cable
Run the power cable of the rear camera along the gap between the front windshield and the ceiling. This ensures that the cables are hidden and do not interfere with the aesthetics of your car interior.
2. Connect the Power Wire to the Taillight
Connect the red power wire from the rear camera to the taillight wiring. This is crucial as it ensures that when you put the car into reverse, the rear camera will automatically display the reversing feed.
3. Mount the Rear Camera
Install the rear camera on the back of the vehicle. Make sure the camera is positioned at an angle that provides a clear view of the area behind your car, and ensure it is securely fixed to avoid any movement during driving.
4. Connect the Camera Cable, On-Board Charger, and AUX Cable
Connect the camera's video cable, on-board charger, and AUX cable to the system. This ensures proper functionality of the rear camera and other connected devices.
5. Reverse Gear Automatically Activates the Rear Camera
Once installation is complete, the rear camera will automatically activate when you shift your car into reverse gear, providing real-time footage of the area behind you for safe reversing.
6. Real-Time Recording While the Car is Moving
The camera will continuously record while the vehicle is in motion, allowing for real-time footage capture, which can be useful for safety and incident documentation.
Conclusion
By following these installation steps, you can easily set up the Fahren F01 Car Play display and rear camera. The display unit offers easy access to car-related information, while the rear camera provides real-time assistance when reversing. We hope this guide helps you complete your installation smoothly and enhances your driving experience with advanced technology.
If you encounter any issues during installation, feel free to contact our customer support team for assistance.
Comments
Leave a comment